Tools/parts needed:
- Air compressor (bigger is better)
- 1/4" npt fitting to connect your air compressor to the Febco valve
- Wrenches for fittings
- Teflon tape (optional)
- Knowledge of how your sprinkler system works
This assumes that you don't have a fancy blow-out valve located downstream from your Febco. If you've got one, for heaven's sake, close the valves on the Febco and use it.
Step One:Turn off the water supply before (upstream of) the Febco valve.
Step Two:Remove the plastic cover from the upper petcock valve on the Febco. Thread in the 1/4" ntp X air compressor fitting.
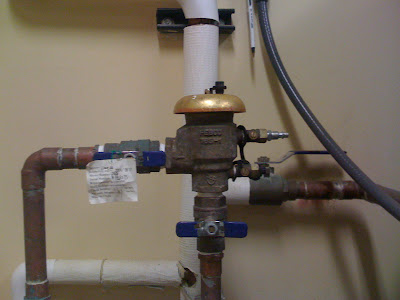
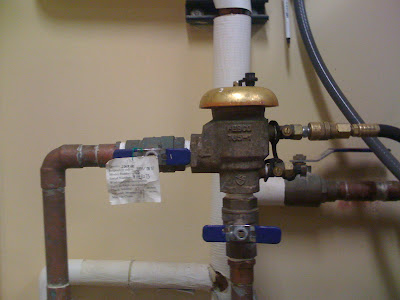
There are four ball valves that have to be set: Two with handles, two with a screwdriver. Going counter-clockwise in the picture below (the same direction the water flows), set:
- The upstream handle valve perpendicular to the pipe (closed)
- The upstream petcock valve straight up and down (closed)
- The downstream petcock valve straight up and down (closed)
- The downstream handle valve parallel to the pipe (open)
Step Three:Fire up your compressor. You'll want to regulate the pressure to about 70 psi. More than that may damage the Febco valve, less than that won't activate the breaker in the valve. You'll know if you have too little pressure because the Febco makes a delightful farting noise. If the pressure is just right, there will be a brief (10 seconds or so) hissing noise and then the valve will quiet down as pressure is directed into the outbound pipe.
Leave the downstream petcock valve closed - we'll use that to control whether we're forcing air into the system or not. Connect the compressor hose.
Step Four:It's your choice. If you've got a big enough compressor (and I can almost guarantee you don't), just leave the compressor hooked up, turn the downstream petcock valve open, then walk around and turn each zone on and off.
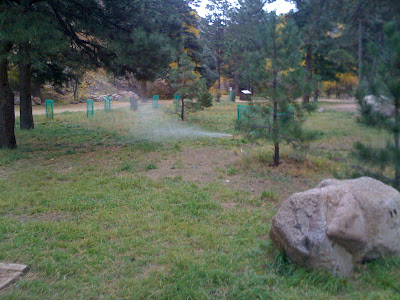
If you've got a small compressor, you'll have to do a bunch more walking. Turn on one zone, walk back to the Febco, open the downstream petcock valve until the compressor's tank pressure is below 70psi, then close the petcock valve. Repeat until you stop blowing air and water out of the sprinkler heads (or whatever you're draining)
It's kinda fun.
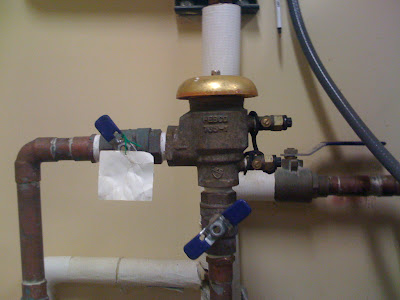
Step Five:When you're all done, it's good to leave all four valves kinda half-open. I don't particularly know why - but at the least, it serves as a good reminder that the valve has been winterized.